
DIY embroidered design projects have surged in popularity, turning simple fabrics into personal, tangible art with calm focus and rewarding results. If you’re a beginner, you’ll love how accessible these step-by-step embroidery for beginners guides are, taking you from your first stitch to small, satisfying achievements. This friendly approach emphasizes clear instructions, beginner-friendly tools, and straightforward demonstrations that you can apply to a tote bag, pillow, or small wall hanging. Starting with a simple motif lets you see progress quickly and builds confidence as your skills expand. With consistent practice, you’ll discover a relaxing hobby that yields practical, decorative results you can proudly display or gift.
Beyond the surface appeal, these projects invite you into a broader world of fabric art and threadwork. For newcomers, exploring basic stitches, simple hoops, and patient practice opens doors to beginner-friendly embroidery adventures and home décor accents. You can think of it as hand-stitching, surface embroidery, and textile crafting that starts with easy patterns and grows into more intricate motifs. The appeal lies in the tactile process, mindful repetition, and the satisfaction of turning thread into decorative items for totes, pillows, or wall art. As you learn, you’ll encounter helpful tutorials, starter projects, and community tips that reinforce your progress and keep motivation high.
Frequently Asked Questions
What are DIY embroidered design projects for beginners?
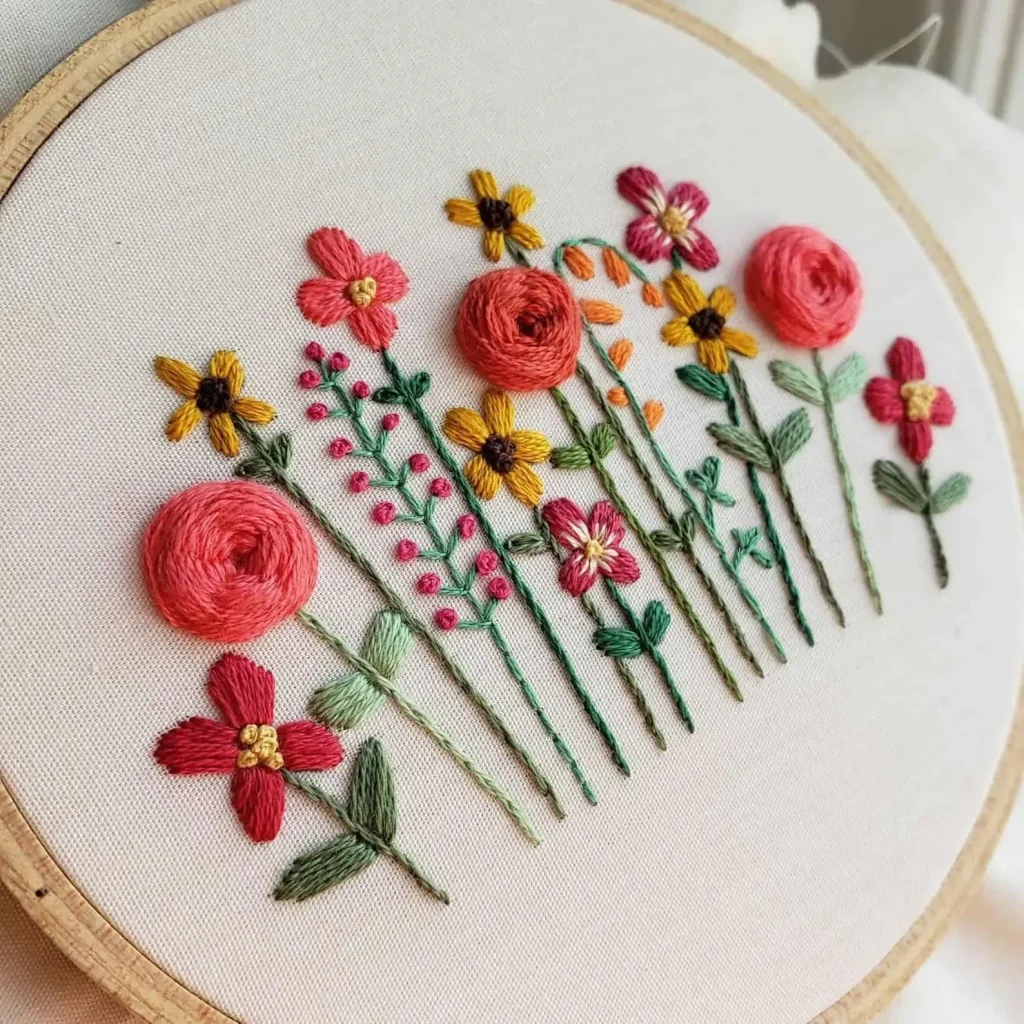
DIY embroidered design projects are beginner-friendly hobbies that build confidence through step-by-step embroidery for beginners. Start with essential tools and basic embroidery stitches, then tackle small projects like a floral motif to see quick progress. These projects use a hoop, a few colors of floss, and simple fabrics such as cotton or linen, with room to grow into tote bags, pillows, or small wall hangings.
Which tools and supplies do I need for DIY embroidery ideas as a beginner?
A solid starter kit makes DIY embroidery ideas accessible: embroidery hoop (5–7 inches), embroidery needles (size 7-9), six-strand floss in several colors, fabric suitable for embroidery (cotton or linen), scissors, pencils or water-soluble markers for transferring designs, a fabric marker or transfer paper, pins, a small cutting mat, and a seam ripper. Add a clean workspace, good lighting, and a hoop stand for comfort.
How can I learn the basic embroidery stitches used in step-by-step embroidery for beginners within DIY embroidered design projects?
Begin with the core stitches: backstitch, running stitch, satin stitch, French knot, and stem stitch. Practice with even tension and consistent stitch length, and keep turning the fabric as you work to avoid crowding. Start with outlining a simple motif, then gradually fill shapes as your confidence grows.
What is a simple beginner-friendly project I can start with in DIY embroidery ideas or beginner embroidery projects?
A small floral motif about 2–3 inches wide is ideal for a first DIY embroidered design project. Transfer a simple pattern, hoop the fabric, and follow a step-by-step approach: outline with backstitch, fill with satin stitch, add French knots for texture, and finish by securing threads. This keeps the project manageable while teaching core stitches and transfer techniques.
How do I avoid tension issues and puckering in DIY embroidered design projects?
To prevent puckering, keep the fabric taut in the hoop, avoid over-tightening stitches, and re-tension as needed. Use an appropriate thread length, a suitable needle, and test on scrap fabric before starting. Choose fabrics with stable weave (like cotton or linen) and maintain even stitch tension throughout.
What are common mistakes and troubleshooting tips for DIY embroidered design projects?
Common issues include uneven stitch length, thread fraying, visible knots, and color bleeding. Fix them by practicing consistent stitch lengths, using shorter thread lengths, avoiding twisting threads, and anchoring tails neatly on the back. If color bleeds occur, test colorfast threads and wash the finished piece gently when needed.
| Topic | Key Points | Notes/Examples |
|---|---|---|
| Introduction |
|
Audience: beginners; Focus: easy start and gradual progression from basic stitches to larger designs. |
| What makes DIY Embroidered Design Projects ideal for beginners |
|
Highlights gradual mastery and structured progression. |
| Tools and materials for DIY Embroidered Design Projects |
|
Starter kit basics to begin with. |
| Basic stitches you’ll use in DIY Embroidered Design Projects |
|
Mastering these stitches builds a foundation for more complex patterns. |
| Beginner Floral Motif: Step-by-step project |
|
Step-by-step floral motif project. |
| Simple geometric design: another beginner-friendly project |
|
Beginner-friendly geometric design steps. |
| Troubleshooting common issues in DIY Embroidered Design Projects |
|
Practical tips to overcome common embroidery setbacks. |
| Finishing, display ideas, and care tips |
|
Ideas for showing off and preserving finished pieces. |
| Developing a routine and expanding your beginner toolkit |
|
Establish consistency; seek community and pattern variety to grow. |
| Conclusion (summary of key takeaways) |
|
A concise recap of the journey for DIY embroidery beginners. |
Summary
DIY embroidered design projects invite beginners into a creative, relaxing journey where patient practice yields tangible, beautiful results. By starting with clear, step-by-step beginner tutorials, you’ll steadily master essential stitches, the right tools, and core techniques, then build confidence to tackle larger, more intricate designs. From decorating everyday items like tote bags and pillows to creating small wall hangings, this path remains practical, enjoyable, and educational from the first stitch. With consistency, curiosity, and a supportive community, your skills grow, your toolkit expands, and your handmade pieces become personal expressions of style, patience, and growth.